Introduction
Acrylic, or Polymethyl Methacrylate (PMMA), is a vital material in modern manufacturing. It offers optical clarity that rivals glass. However, it weighs half as much and resists impacts far better. For product designers and engineers, choosing the right fabrication method is critical.
Acrylic CNC machining stands out as the best choice for complex, high-precision plastic parts. Whether you need optical lenses, medical manifolds, or rugged outdoor displays, CNC milling delivers exact tolerances and pristine surfaces.
Yet, machining acrylic comes with distinct challenges. It is a thermoplastic, meaning it reacts strongly to heat. If you use the wrong speeds or incorrect cutters, acrylic can crack, melt, or develop a cloudy finish.
At Moshijia Technology, our production engineers process thousands of custom acrylic parts every month. We know how this material behaves under a cutting tool.
This comprehensive guide will explain how acrylic CNC machining works. We will share concrete technical parameters, practical troubleshooting tips, and real-world engineering insights to ensure your next project succeeds.
What is Acrylic CNC Machining?
Defining the Machining Process
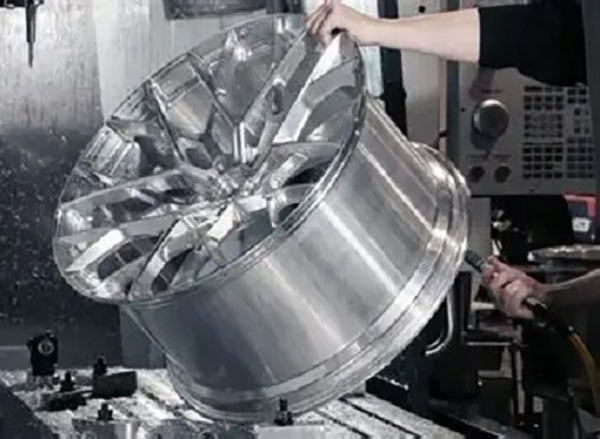
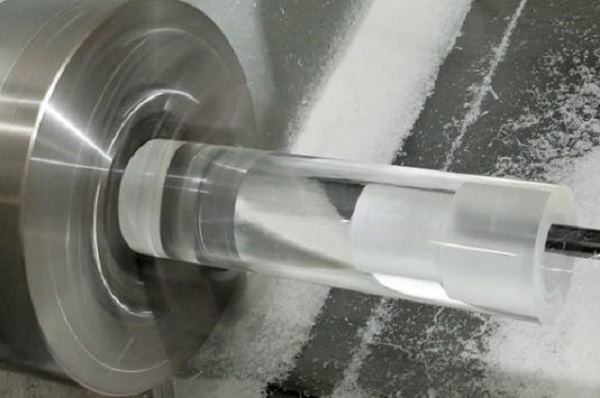
Acrylic CNC machining is a subtractive manufacturing process. It uses computerized controls and rotating cutting tools to remove material from a solid plastic block. The process begins with a digital 3D model.
The machine follows precise coordinates to shape the acrylic with extreme accuracy. Unlike manual milling, CNC machining guarantees repeatability within tight tolerances. This makes it ideal for both functional prototypes and low-volume production runs.
Understanding Acrylic Material Properties
To machine acrylic successfully, you must understand its two primary commercial forms: cast acrylic and extruded acrylic. They look identical, but they behave very differently under a cutting tool.
- Cast Acrylic: Makers produce this by pouring liquid monomer into molds. It has a high molecular weight. This makes it highly rigid, thermally stable, and easy to machine. It leaves clean edges and resists melting during cutting. It is our top choice at Moshijia Technology for precision parts.
- Extruded Acrylic: Factories make this by pushing softened plastic through dies. It has a lower molecular weight and a lower melting point. It is highly susceptible to chipping, stress cracking, and melting during CNC milling. It is cheaper but requires much stricter thermal control.
| Material Property | Cast Acrylic (Recommended) | Extruded Acrylic |
| Melting Point | Approx. 160°C (320°F) | Approx. 150°C (302°F) |
| Machinability | Excellent; crisp edges | Moderate; prone to melting |
| Stress Cracking | Low risk | High risk |
| Optical Clarity | Superior after polishing | Good, but degrades with heat |
| Best Application | Complex B2B mechanical parts | Simple panels, light guides |
Why Choose CNC Machining for Acrylic?
Unmatched Optical Clarity
Acrylic boasts a light transmission rate of 92%. This value matches or exceeds standard glass. Acrylic CNC machining allows you to create thick, 3D geometries that retain this transparency.
By utilizing precise tool paths, a CNC mill can create perfectly flat surfaces. These surfaces require minimal post-processing to achieve total optical clarity. This is essential for components like light pipes, microfluidic chips, and optical prisms.
Superior Outdoor Weather Resistance
Acrylic naturally resists ultraviolet (UV) radiation. It does not yellow, degrade, or turn brittle when exposed to sunlight for years.
Furthermore, it resists water absorption and withstands many diluted acids. CNC-machined acrylic parts maintain their structural integrity and clear appearance in harsh outdoor environments far better than alternative plastics like polycarbonate or polystyrene.
Exceptional Surface Polishing Potential
One major advantage of acrylic is its response to post-processing. After acrylic CNC machining, the material can undergo multiple polishing methods.
Vapor polishing uses chemical solvents to melt surface micro-scratches instantly. Flame polishing smooths external edges quickly.
For maximum clarity, mechanical diamond polishing delivers a flawless, mirror-like finish. This adaptability makes acrylic the premier choice for aesthetic housings and instrument panels.
Managing Thermal Deformation Risks
The primary challenge of acrylic is its low thermal conductivity. Plastics do not dissipate heat like aluminum or steel.
During acrylic CNC machining, the friction between the cutting tool and the workpiece generates intense localized heat. If the temperature exceeds 150°C, the acrylic will soften and stick to the cutter. This causes severe burrs, dimensional warping, and catastrophic part failure.
Engineers must use optimized feeds, speeds, and cooling strategies to mitigate this risk.
The Three Stages of Acrylic CNC Machining
[CAD/CAM Design] ---> [Machine Setup & Cooling] ---> [Executing Cut Paths]
(Select Cutters)      (Fix Internal Stress)          (Roughing & Finishing)
Stage 1: Design and Tool Selection
Optimizing the CAD Model
Every successful project begins with a well-optimized CAD design. Acrylic is rigid but brittle, meaning it concentrates stress easily.
Avoid sharp internal corners in your designs. Always include a minimum corner radius of 0.5 mm to accommodate the circular profile of the milling cutter.
Keep wall thicknesses above 1.5 mm for small parts, and above 3.0 mm for larger enclosures. Thin walls will vibrate during machining, causing unsightly chatter marks or cracks.
Choosing the Perfect Cutting Tools
Never use standard woodworking or steel-cutting bits for acrylic. They have improper geometries that trap heat and chip the plastic.
Instead, opt for solid carbide end mills with a high-polished flute surface. The polished flute reduces friction, allowing plastic chips to slide out smoothly.
- Single-Flute Upcut Spiral Bits: This is the absolute best tool choice for acrylic CNC machining. The single flute provides a massive space for chip evacuation. The upward spiral design lifts hot plastic chips out of the cut immediately, preventing them from re-welding to the part.
- Two-Flute Straight Bits: These work well for shallow profiling and edge slotting where chip packing is not an issue.
- Avoid Multi-Flute Cutters: Three-flute or four-flute cutters have very small chip valleys. They clog with plastic instantly, causing immediate material melting.
Stage 2: Machine Setup and Cooling
Secure Workholding Without Stress
Acrylic scratches easily and deforms under heavy pressure. If you clamp an acrylic block too tightly in a metal vise, you will introduce massive internal stresses. When the cutting tool hits these stressed zones, the material will crack instantly.
Use vacuum tables for large acrylic sheets. For smaller blocks, use soft jaw vices or apply protective masking tape combined with high-strength cyanoacrylate (super glue) fixtures. This distributes clamping forces evenly.
Critical Cooling Strategies
Cooling is non-negotiable during high-speed acrylic CNC machining. It removes heat and clears chips from the cutting zone simultaneously.
- Compressed Air Blast: This is the cleanest option. A continuous stream of cold, high-pressure air cools the tool and blows chips away from the cutter path.
- Water-Soluble Coolant Mist: A light mist of water and oil provides excellent lubrication. This yields a much smoother surface finish.
- Avoid Alcohol-Based Coolants: Never allow isopropyl alcohol or chemical solvents to touch acrylic under stress. It triggers instant environmental stress crazing, filling your clear part with thousands of micro-cracks.
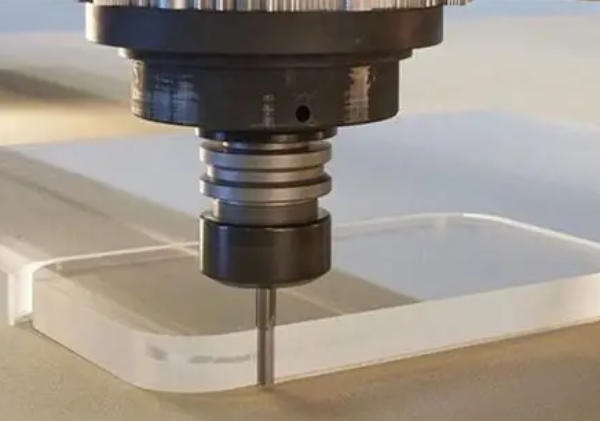
Stage 3: The Actual Cutting Process
Step 1: Roughing Tool Paths
The roughing phase focuses on removing large volumes of material quickly. Use a larger single-flute carbide tool, such as a 6 mm end mill.
Set a deep axial depth of cut but maintain a narrow radial step-over. This strategy spreads tool wear evenly and throws large, cool chips away from the workpiece. Always leave a 0.2 mm to 0.3 mm material allowance on all critical walls for the subsequent finishing pass.
Step 2: Finishing Tool Paths
The finishing pass establishes the final dimensions and surface texture of the part. Switch to a fresh, razor-sharp tool.
Reduce your feed rate and implement a shallow depth of cut (0.1 mm). High spindle speeds combined with a steady, moderate feed rate yield an incredibly smooth finish. This step eliminates the tool marks left behind during the roughing stage.
Step 3: Polishing Path Optimization
To minimize manual labor later, optimize your final CNC paths for polishing. Use a climb milling direction rather than conventional milling; this ensures the tool cuts cleanly through the plastic instead of rubbing against it.
Utilize constant-velocity 3D tool paths for curved surfaces to prevent the machine from pausing. Any momentary pause in machine movement will cause the spinning bit to melt a small divot into the acrylic.
Acrylic CNC Machining vs. Laser Cutting
When manufacturing clear plastic parts, product teams frequently compare CNC machining with laser cutting. Both technologies offer unique strengths depending on the specific geometry and volume of your project.
Core Technology Comparison
CNC machining uses physical cutting tools to mechanically carve away material. It operates across three, four, or five axes, making it highly versatile.
In contrast, laser cutting uses a concentrated thermal beam to melt and vaporize material along a two-dimensional plane.
Key Operational Differences
- Geometric Freedom: Laser cutters are strictly limited to 2D profiles or flat sheet cutting. If your part requires stepped pockets, counterbored holes, 3D contours, or tapped threads, acrylic CNC machining is your only viable option.
- Material Thickness: High-power lasers can cut acrylic up to 20 mm thick, but the heat leaves a tapered edge profile. CNC mills easily process acrylic blocks up to 100 mm thick while maintaining perfectly square, vertical edges.
- Edge Quality and Internal Stress: Laser cutting melts the acrylic edge, creating an instant, glossy “laser-polished” look. However, this intense heat introduces severe internal thermal stresses along the perimeter. If you later apply glue or paint to a laser-cut part, it will crack instantly. CNC machining creates zero thermal stress, making the part structurally stable.
| Metric | Acrylic CNC Machining | Laser Cutting |
| Dimensional Geometry | Full 3D shapes, pockets, curves | Limited to 2D flat profiles |
| Maximum Thickness | Up to 100 mm+ | Typically under 25 mm |
| Edge Profile | Perfectly square (90°) | Slanted or tapered edges |
| Internal Stress Level | Zero stress; highly stable | High stress; prone to crazing |
| Setup Cost | Moderate (requires programming) | Very low (direct vector file) |
Common Machining Defects and How to Fix Them
Preventing Chipping and Cracking
- The Problem: The edges of the acrylic block fracture, chip, or breakout, particularly where the cutting tool exits the material.
- The Cause: This occurs due to excessive feed rates, dull cutting tools, or improper material choice (such as brittle extruded acrylic).
- The Solution: Reduce the feed rate by 20% to 30% when the tool exits a cut. Always use razor-sharp, upward-spiral carbide bits. If your budget allows, switch from extruded acrylic to premium cast acrylic blocks.
Eliminating Surface Melting and Re-welded Chips
- The Problem: Acrylic chips melt into a sticky paste, wrapping around the end mill and leaving a rough, gouged surface on the part.
- The Cause: The spindle speed is set too high relative to the linear feed rate, or chip evacuation is inadequate. The tool rubs instead of cutting.
- The Solution: Use the Chip Load Formula to calculate your parameters accurately:$$\text{Feed Rate} = \text{Spindle RPM} \times \text{Number of Flutes} \times \text{Chip Load}$$For acrylic, target a chip load of 0.05 mm to 0.15 mm per tooth. Lower your spindle RPM or increase your feed rate to ensure the machine cuts crisp, individual flakes rather than melting the plastic.
Solving Edge Cloudiness and Tool Marks
- The Problem: The machined walls look milky, opaque, or show deep, step-like vibration marks.
- The Cause: Mechanical chatter caused by poor workpiece clamping, long tool extensions, or an excessively deep radial cut.
- The Solution: Shorten the length of the tool extending from the collet to maximize rigidity. Use a specialized finish pass with a shallow radial depth (0.1 mm). Ensure your workholding setup firmly supports the material close to the cutting path to eliminate vibration.
Conclusion
Acrylic CNC machining is an exceptionally capable manufacturing process for high-precision, optically clear, and weather-resistant plastic components. To succeed, you must manage the thermal and mechanical characteristics of the plastic.
By selecting cast acrylic, utilizing single-flute carbide end mills, and maintaining precise chip loads with dedicated air cooling, you can eliminate cracking and melting issues entirely. This process reliably delivers tight tolerances and flawless finishes for demanding engineering applications.
FAQ
Can I use standard metal-cutting fluids on CNC acrylic parts?
No. Most standard metal coolants contain petroleum distillates, sulfur, or chlorine. These chemicals attack the molecular structure of acrylic, causing instant stress crazing and micro-cracking. Use only clean compressed air, pure water mist, or specialized, manufacturer-approved plastic coolants.
What is the optimal spindle speed and feed rate for acrylic CNC machining?
For a standard 6 mm single-flute carbide end mill, a proven baseline starting point is a spindle speed of 18,000 RPM combined with a feed rate of 2,500 mm/min. Always adjust these parameters to maintain a crisp, consistent chip thickness and prevent any melting or rubbing.
Why does my acrylic part crack weeks after a successful CNC milling run?
This is caused by residual internal stress. Machining creates localized mechanical forces within the plastic block. If the part is exposed to temperature swings or cleaning chemicals later, these latent stresses release, causing delayed cracking. To prevent this, anneal your critical parts in a temperature-controlled oven at 80°C for several hours post-machining to relieve internal stress.
Is it possible to tap reliable threads directly into CNC-machined acrylic?
Yes. You can cut threads into acrylic using sharp taps or CNC thread mills. However, choose coarse threads over fine threads, as fine threads strip easily. Always ensure the pre-drill hole includes a generous chamfer to prevent the plastic from lifting and cracking around the entry hole during tapping.
Get Projects Quote with Moshijia Technology
Ready to move your custom acrylic designs into production? Contact Moshijia Technology today. Our dedicated product engineers utilize state of the art multi-axis CNC machinery and optimized tooling configurations to deliver flawless, high-precision acrylic parts.