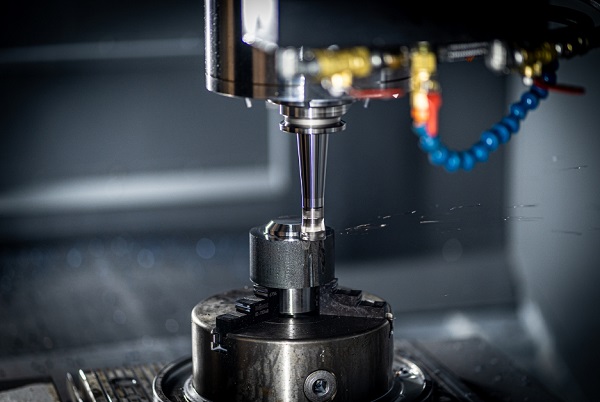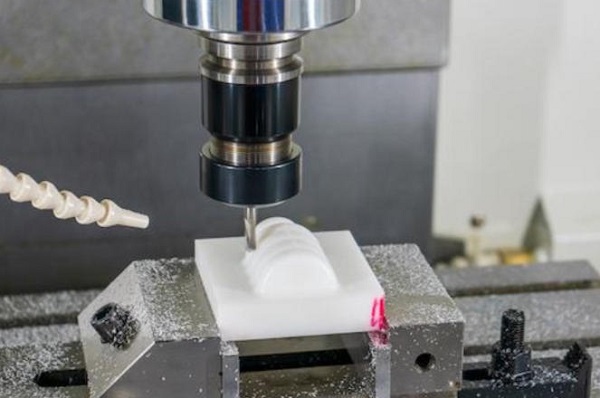
Acrylic is a top choice for transparent parts. It offers optical clarity, light weight, and great impact resistance. You will find it in medical devices, signs, and custom light guides. But if you have tried acrylic cnc machining, you know it can be tricky. One wrong setting and the material melts, cracks, or chips.
At Moshijia Technology, our engineers machined thousands of acrylic components. We know how frustrating it is to ruin a part on the last toolpath. This comprehensive guide delivers six practical tips to help you get perfect, crystal-clear acrylic parts every single time.
1. Choose Cast Over Extruded Acrylic
Your success starts long before you turn on your CNC machine. You must choose the right type of raw material. Acrylic sheets come in two main types: cast and extruded.
Understanding Material Differences
Cast acrylic is made by pouring liquid monomer into glass molds. Extruded acrylic is pushed through a die using an extruder. These two manufacturing processes create very different physical properties.
- Cast Acrylic: This material has a high molecular weight. It behaves beautifully under a cutting tool. It does not melt easily and delivers excellent clarity when polished.
- Extruded Acrylic: This material has a lower molecular weight and a lower melting point. Under the heat of a CNC router bit, it becomes gummy. It frequently sticks to the tool flutes and ruins the cut.
| Property | Cast Acrylic | Extruded Acrylic |
| Melting Point | Higher (More thermal resistance) | Lower (Melts easily) |
| Machining Performance | Excellent, crisp chips | Poor, gummy and sticky |
| Stress Levels | Low internal stress | High internal stress |
| Thickness Tolerance | Varies slightly (+/- 10%) | Very consistent (+/- 2%) |
| Best Application | Complex CNC parts, optical components | Simple laser cutting, flat panels |
Why Cast Acrylic Wins
We always recommend cast acrylic for complex CNC projects. It creates clean, crisp plastic chips instead of long, molten strings. Extruded acrylic is only acceptable for simple flat shapes with very light machining requirements. If your part requires deep pockets, threads, or fine details, always buy cast stock.
2. Use Single-Flute O-Flute Cutters
Tool selection is critical for plastics. Many machinists make the mistake of using standard aluminum or woodworking end mills. These tools have too many flutes, which traps heat and destroys the plastic.
Standard End Mill (3-4 Flutes) -> Traps Heat -> Acrylic Melts
Single Flute O-Flute Cutter     -> Large Valley -> Clears Chips -> Cool Cut
The Power of Single Flutes
For optimal acrylic cnc machining, use a single-flute upward spiral O-flute cutter.
A single-flute tool has one cutting edge. This design provides a massive open valley (the “O” shape) for chip evacuation. Every time the tool rotates, it takes a clean bite and immediately throws the chip out of the slot.
   [ Large Flute Valley ]  <-- Sweeps chips out instantly
       \       /
        \  O  /            <-- Cross-section shape
         \___/
     [Cutting Edge]
Avoid Multi-Flute Traps
If you use a 3-flute or 4-flute end mill, the space between the cutting edges is tiny. Acrylic chips cannot escape fast enough. The tool recuts the same chips, frictional heat builds up instantly, and the acrylic melts onto the tool. Once plastic welds to your cutter, the tool will snap.
Engineer’s Advice: Keep your tool coatings simple. Avoid TiAlN coatings because they require high temperatures to work effectively and actually attract acrylic buildup. Stick to uncoated solid carbide or specialized polished diamond-like carbon (DLC) coatings for the smoothest finish.
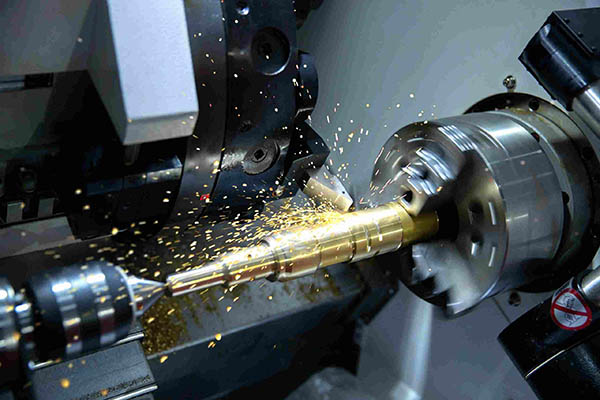
3. Optimize Your Cutting Parameters
Machining acrylic requires a fast feed rate and a moderate spindle speed. This combination ensures the tool cuts the plastic rather than rubbing against it. Rubbing creates friction, and friction means heat.
Calculate the Target Chip Load
Your goal is to maintain a healthy chip load (the thickness of the chip cut by one revolution of the cutter). For acrylic, aim for a chip load between 0.004 inches and 0.010 inches (0.1 mm to 0.25 mm) depending on the tool diameter.
Use these proven formulas to set up your CAM software:
$$\text{Chip Load} = \frac{\text{Feed Rate}}{\text{RPM} \times \text{Number of Flutes}}$$
$$\text{Feed Rate} = \text{RPM} \times \text{Number of Flutes} \times \text{Chip Load}$$
Real-World Parameter Reference Table
Here is a tested reference chart from the Moshijia shop floor for a 1/4-inch (6.35mm) Single-Flute Carbide Cutter in cast acrylic:
| Operation Type | Spindle Speed (RPM) | Feed Rate | Depth of Cut (DOC) |
| Roughing Cut | 18,000 RPM | 150 in/min (3800 mm/min) | 0.125 in (3.17 mm) |
| Finishing Pass | 16,000 RPM | 90 in/min (2300 mm/min) | 0.015 in (0.38 mm) |
| Slotting Cut | 15,000 RPM | 110 in/min (2800 mm/min) | 0.060 in (1.52 mm) |
Avoid the Rubbing Zone
If your spindle spins too fast (e.g., 24,000 RPM) while your feed rate is too slow (e.g., 40 in/min), the tool will rub against the material. The acrylic will smoke, turn white, and melt into a solid blob. If you hear a high-pitched squeal, increase your feed rate or lower your RPM immediately.
4. Master Cooling and Chip Evacuation
Acrylic does not conduct heat well. The heat generated during cutting stays right at the tool edge. You must use external methods to clear chips and control temperatures.
Use High-Pressure Compressed Air
For most acrylic cnc machining jobs, a strong, continuous blast of compressed air is the best solution. Direct the air nozzle precisely at the point where the cutter meets the plastic.
[Air Nozzle] ====> (High Pressure Blast) ====> [Cutting Zone]
                                                      ||
                                                      \/
                                         (Clears Chips + Cools Tool)
The air blast performs two crucial jobs:
- It cools the cutter and workpiece down.
- It physically blows the chips away so the tool cannot recut them.
Use Mist Coolant Safely
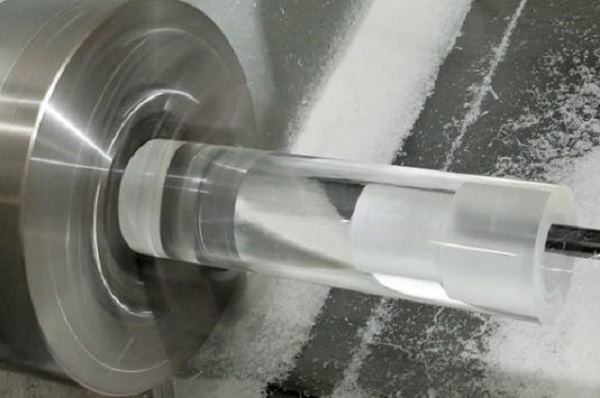
If you need an ultra-smooth finish on deep pockets, use a mist coolant system. A water-based soluble oil mist works beautifully.
However, you must avoid harmful chemicals. Never use isopropyl alcohol (IPA), WD-40, or petroleum-based solvents on acrylic. These chemicals break down the polymer chains instantly, causing the plastic to develop thousands of tiny cracks. This catastrophic failure is called environmental stress crazing.
5. Master Post-Processing and Stress Relief
Even a perfectly machined acrylic part contains internal stress from the cutting forces. If you skip stress relief, your part might crack weeks later when exposed to cleaning agents or assembly pressure.
The Annealing Process
Annealing is the absolute best way to stabilize machined acrylic parts. This process involves heating the plastic in a controlled oven and cooling it down very slowly.
- Place the part in a specialized air-circulation oven at room temperature.
- Raise the temperature slowly to 180°F (82°C) at a rate of 30°F per hour.
- Hold the temperature for a duration of 1 hour per millimeter of wall thickness.
- Cool the oven down to room temperature at a slow rate of no more than 15°F per hour.
Polishing for Total Clarity
Machined acrylic edges look frosted or opaque. You can restore total optical transparency using three common polishing methods:
- Flame Polishing: Pass a clean hydrogen-oxygen flame quickly across the machined edge. The heat melts the microscopic ridges instantly to create a glossy surface. This requires a steady hand; if you linger too long, the material will bubble.
- Vapor Polishing: Expose the part to heated solvent vapors (like methylene chloride). The vapor melts the surface layer evenly. This process is highly effective for internal channels but requires strict safety gear.
- Mechanical Buffing: Sand the part with progressive grits from 400 up to 2000. Finish with a soft cotton wheel and a specialized plastic polishing compound. This is the safest method for achieving precision optical finishes.
6. Troubleshoot and Avoid Common Defects
When machining acrylic, you will likely encounter a few common roadblocks. Use this troubleshooting matrix to fix your finish issues quickly.
Crazing and Hairline Cracks
- The Cause: High internal stress mixed with chemical exposure or excessive tool heat.
- The Solution: Switch to cast acrylic, reduce your spindle speed to lower friction, use pure air cooling, and always anneal your parts immediately after machining.
Material Melting and Welding
- The Cause: Too much friction, incorrect chip load, or recutting old chips.
- The Solution: Use a single-flute cutter, increase your feed rate, reduce your RPM, and reposition your air blast nozzle to clear chips instantly.
Edge Chipping and Blowouts
- The Cause: Incorrect entry/exit paths, or dull tools dulling down.
- The Solution: Do not plunge straight down into acrylic. Use a ramp entry or a helical entry path at an angle of 10 to 15 degrees. When exiting a profile cut, leave a 0.5mm skin or use tabs to support the material so it does not snap off before the tool finishes its path.
Incorrect Plunge:
Tool ↓
[ Acrylic Block ] --> Direct impact causes micro-cracks

Correct Ramp Entry:
Tool ↘ ↘ ↘
[ Acrylic Block ] --> Smooth, gradual engagement protects edges
Summary Troubleshooting Checklist
| Symptom | Quick Fix Checklist |
| White/Cloudy Edges | Reduce RPM, increase feed rate, check tool sharpness. |
| Melting in Pockets | Add a high-pressure air blast, use an upward spiral flute. |
| Cracking Around Holes | Reduce the drill peck depth, use a slow feed rate on breakthrough. |
| Chipped Corners | Use a ramped lead-in, check fixture rigidity to reduce vibration. |
Frequently Asked Questions
Can I use standard metalworking drill bits on acrylic?
No. Standard metal drill bits have a steep 118-degree tip angle that grabs the plastic and cracks it upon exit. For acrylic, grind your drill bits to a flatter 135-degree angle and reduce the cutting edge rake angle to 0 degrees so it scrapes rather than gouges.
What is the maximum depth of cut per pass for acrylic?
As a general rule of thumb, your depth of cut (DOC) should not exceed half of your tool’s diameter per pass. For a 1/4-inch cutter, use a maximum depth of cut of 0.125 inches to keep cutting forces low and prevent deflection.
Why did my acrylic part crack days after it was finished?
This is caused by residual internal stress. Machining creates localized heat and stress zones. When the part interacts with moisture, thermal changes, or assembly forces later on, those stress zones crack. Annealing your parts prevents this.
Can I machine acrylic without a CNC fluid coolant system?
Yes. You can machine acrylic using only a high-pressure air blast, provided you use cast acrylic, a single-flute O-flute cutter, and an optimal, fast feed rate.
Get Project Quotes with Moshijia Technology
Need professional, stress-free acrylic components? Skip the trial and error. Moshijia Technology specializes in precision acrylic cnc machining for optical, medical, and industrial applications. We utilize advanced multi-axis CNC machines, optimized tooling setups, and specialized post-processing lines to deliver flawless, crystal-clear plastic components with tight tolerances.