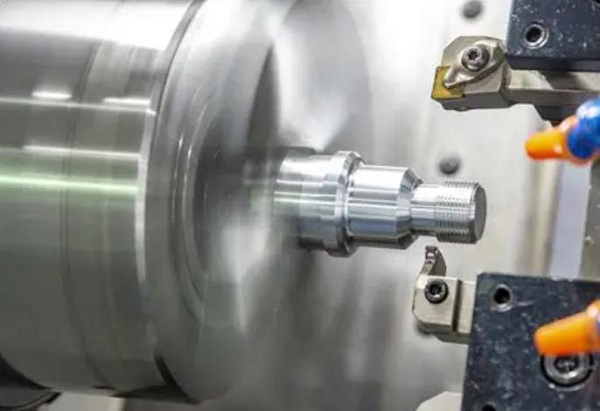
Introduction
Setting up lathe tooling correctly is the difference between a clean cut and a ruined part. For new operators or small shop technicians, the process can feel overwhelming. There are too many tools, too many angles, and too many ways to get it wrong.
This guide walks you through every step. From choosing the right tool to running your first test cut. No fluff. No guesswork. Just what you need to get lathe tooling right the first time.
We cover tool types, holder selection, height setting, calibration, and test runs. Each section includes real-world tips from shop floors, not textbook theory. By the end, you’ll have a repeatable process you can trust.
Understanding Lathe Tooling
Before you touch the machine, you need to know what you’re working with. Lathe tooling includes every component that removes material. That means holders, inserts, shims, and the tools themselves.
Types of Lathe Tools
Lathe tools fall into three main categories. Each serves a different purpose.
| Tool Type | Primary Use | Common Application |
|---|---|---|
| Cutting tools | External turning, facing | Removing material from OD |
| Boring tools | Internal diameter work | Enlarging or finishing holes |
| Forming tools | Contour shaping | Threads, grooves, profiles |
1. Cutting Tools
These are your workhorses. They handle roughing and finishing passes on the outside of a part. A typical turning tool has a carbide or HSS insert held in a clamp-style holder. You’ll use these 80% of the time on a lathe.
2. Boring Tools
Boring bars reach inside a workpiece. They cut the internal diameter. The challenge? They flex easily. A 12-inch boring bar can deflect 0.005 inches under light pressure. That kills your tolerance. Always keep overhang as short as possible.
3. Forming Tools
These shape specific profiles. Threading tools, grooving tools, and knurling tools all fall here. They demand precise alignment. Even a 1-degree tilt ruins a thread pitch.
Tool Materials and Their Properties
The material of your insert determines how fast you can cut, how long it lasts, and what it costs.
| Material | Hardness (HRC) | Max Cutting Speed | Best For |
|---|---|---|---|
| High-speed steel (HSS) | 62–65 | 80 SFM | Low-speed, general purpose |
| Carbide | 88–92 | 500+ SFM | High-speed production |
| Cobalt (M42) | 64–66 | 150 SFM | Hard steels, interrupted cuts |
1. High-speed Steel (HSS)
HSS is tough and cheap. It handles vibration well. But it dulls fast. Use it for small shops running low volumes or for materials like aluminum and brass. At 80 SFM, you won’t burn the edge.
2. Carbide
Carbide is the production standard. It holds a sharp edge 5–10x longer than HSS. You can run 400–600 SFM on mild steel. The downside? It’s brittle. One hard chip and the insert chips. Always use a chip breaker.
3. Cobalt
Cobalt inserts (M42 grade) have 8% cobalt content. That gives them red hardness. They stay hard at high temperatures. Perfect for stainless steel or hardened alloys. Cost is 2–3x HSS, but tool life justifies it.
Essential Tools and Equipment
You can’t set up lathe tooling with just the lathe. You need the right supporting gear.
Lathe Machine Components
Every lathe has these key parts that affect your setup:
- Spindle – Holds the workpiece. Must run true.
- Carriage – Moves the tool along Z and X axes.
- Cross slide – Controls depth of cut (X-axis).
- Compound rest – Sets angles for taper turning.
- Tailstock – Supports long workpieces.
If any of these are worn, your lathe tooling setup will fail no matter how perfect your tools are.
Tool Holders and Their Types
| Holder Type | Clamping Method | Best Use Case |
|---|---|---|
| CNMG (clamp) | Screw clamp | General turning |
| WNMG (wrench) | Hex wrench | Quick change setups |
| S-type (bar) | Set screw | Boring operations |
| ISO/VDI | Modular system | High-volume production |
For small shops, CNMG holders are the best starting point. They’re cheap, versatile, and easy to adjust.
Measuring Instruments
You need these to verify your setup:
- Dial indicator – Checks runout and alignment. Accurate to 0.0001″.
- Calipers – Quick measurements. Good to 0.001″.
- Height gauge – Sets tool height relative to centerline.
- Feeler gauges – Checks gap and clearance.
Skip any of these, and you’re guessing. Guessing destroys parts.
Preparing the Lathe Machine
A dirty or misaligned lathe will ruin even the best lathe tooling setup.
Cleaning and Maintenance
Before every setup:
- Wipe down all ways (bed, cross slide, carriage).
- Check for chips in the gibs.
- Lubricate the ways with light machine oil.
- Inspect the spindle taper for burrs.
A burr in the spindle taper causes 0.002″ runout. That’s enough to fail a tolerance check on most parts.
Checking Alignment and Level
Use a precision level on the bed. The lathe must be level within 0.002″ per foot. If it’s not, gravity will pull your cut off-center on long parts.
Check spindle runout with a dial indicator. It should read under 0.001″ TIR. If it’s higher, clean the taper or replace the collet.
Ensuring Safety Measures Are in Place
- Wear safety glasses. Always.
- Remove all loose tools from the chuck.
- Ensure the emergency stop works.
- Never leave the lathe running unattended.
Lathe tooling setup involves sharp edges and spinning mass. Respect the machine.
Selecting the Right Tooling
Choosing the wrong tool is the #1 cause of premature failure. Here’s how to pick right.
Assessing the Material to Be Machined
| Material | Recommended Insert | Cutting Speed | Feed Rate |
|---|---|---|---|
| Mild steel | CNMG 432 (carbide) | 400 SFM | 0.008 IPR |
| Stainless steel | CNMG 431 (cobalt) | 120 SFM | 0.005 IPR |
| Aluminum | CNMG 432 (polycrystalline) | 800 SFM | 0.012 IPR |
| Cast iron | CNMG 432 (carbide) | 300 SFM | 0.006 IPR |
Match your insert to the material. A carbide insert on stainless will crater in minutes.
Choosing the Appropriate Tool Geometry
Insert geometry matters. The three key angles:
- Rake angle – Controls chip flow. Positive rake = smoother cut. Negative rake = stronger edge.
- Clearance angle – Prevents rubbing. 7° is standard. Go to 15° for hard materials.
- Nose radius – Affects finish and strength. 0.8mm for finishing. 1.2mm for roughing.
For general-purpose turning, start with a CNMG 432 insert at 0° rake, 7° clearance, 0.8mm nose radius.
Understanding Cutting Speeds and Feeds
Wrong speeds kill tools. Here’s a quick reference:
| Operation | Speed (SFM) | Feed (IPR) | Depth of Cut |
|---|---|---|---|
| Rough turning | 300–400 | 0.010–0.015 | 0.060″ |
| Finish turning | 500–600 | 0.005–0.008 | 0.020″ |
| Grooving | 200–300 | 0.003–0.005 | Full width |
| Boring | 250–350 | 0.006–0.010 | 0.030″ |
Always start conservative. You can always increase speed. You can’t un-break an insert.
Installing Tool Holders
This is where most beginners mess up. A loose holder ruins everything.
Types of Tool Holders
Stick with one system at first. CNMG clamp-style holders are the most common for small shops. They’re simple, cheap (8–15 each), and work for 90% of turning operations.
Step-by-Step Installation Process
- Clean the tool post surface. Remove all chips and oil.
- Slide the holder into the tool post. Make sure it seats fully.
- Tighten the clamp screw to 40–50 ft-lbs. Use a torque wrench if you have one.
- Check that the holder doesn’t shift when you push on it by hand.
Pro tip: Use blue Loctite on the clamp screw. It prevents loosening from vibration without making future removal impossible.
Ensuring Proper Tightness and Alignment
After tightening, run the carriage by hand. The tool should not move. If it shifts even slightly, re-tighten or clean the seat.
Check alignment with a dial indicator on the insert. It should read under 0.001″ TIR. If not, the holder is crooked. Loosen, reposition, and re-tighten.
Setting Tool Height
Tool height is the most overlooked step in lathe tooling setup. Get it wrong, and your part diameter will be off every time.
Importance of Tool Height in Machining
The cutting edge must sit exactly on the lathe centerline. If it’s too high, the tool digs in and the part diameter shrinks. If it’s too low, the tool rubs and chatter starts.
Even 0.010″ off center can cause a 0.020″ diameter error. That’s double the offset. Don’t guess.
Methods for Measuring and Adjusting Tool Height
Method 1: Tailstock Center Method (Most Accurate)
- Lock the tailstock center in place.
- Loosen the tool post.
- Slide the tool under the tailstock center.
- Adjust height until the tool tip just touches the center.
- Lock the tool post.
Method 2: Height Gauge Method (Fast)
- Set a height gauge to the exact centerline height.
- Place it on the carriage.
- Adjust the tool until the insert tip matches the gauge.
Method 1 is more accurate. Method 2 is faster for production setups where 0.005″ tolerance is acceptable.
Common Mistakes to Avoid
| Mistake | Consequence | Fix |
|---|---|---|
| Setting height by eye | 0.010″–0.030″ error | Always use a gauge or tailstock |
| Not re-checking after tightening | Tool shifts down | Re-check height after every clamp |
| Ignoring workpiece diameter | Tool too high/low for large parts | Center height = lathe center, not part surface |
Calibrating the Lathe
Calibration ensures your lathe tooling produces repeatable results.
Importance of Calibration for Accuracy
A lathe that’s off by 0.002″ per inch will produce a part that’s 0.020″ wrong on a 10-inch diameter. Calibration catches this before you waste material.
Step-by-Step Calibration Process
- Check X-axis (cross slide):
- Dial in 1.000″ on the DRO.
- Move the carriage 10 inches.
- Verify the readout shows 10.000″.
- If not, adjust the backlash compensator.
- Check Z-axis (carriage):
- Same process. Move 5 inches, verify readout.
- Check spindle runout:
- Mount a dial indicator in the tool post.
- Touch the spindle nose.
- Rotate by hand.
- Total runout should be under 0.001″.
- Verify tailstock alignment:
- Lock the tailstock.
- Dial indicator on the tailstock quill.
- Move the carriage the full bed length.
- Deviation should be under 0.002″.
Tools Required for Calibration
- Dial indicator with magnetic base
- Test bar (ground, 1″ diameter)
- Micrometer or calipers
- Feeler gauges (for backlash check)
Do this once a month. Or after any crash or maintenance.
Testing the Setup
Never run a full production batch without testing first.
Conducting Initial Test Runs
- Set speed to 50% of your target.
- Take a light cut: 0.010″ depth, 0.005 IPR.
- Run for 2–3 inches.
- Stop. Measure the diameter.
If the diameter is within 0.002″ of target, you’re good. Increase to 75% speed and repeat.
Analyzing Results and Making Adjustments
| Symptom | Likely Cause | Fix |
|---|---|---|
| Chatter marks | Tool too high or low | Re-set height |
| Taper on OD | Tailstock misaligned | Realign tailstock |
| Poor finish | Feed too high | Reduce to 0.005 IPR |
| Insert chipping | Speed too high | Drop 20% SFM |
| Built-up edge | Wrong rake for material | Switch to positive rake insert |
Documenting Findings for Future Reference
Write down:
- Material and hardness
- Insert grade and geometry
- Speed, feed, depth of cut
- Tool height offset
- Any adjustments made
This log saves hours on your next setup. Lathe tooling is a repeatable process. Treat it like one.
Conclusion
Setting up lathe tooling doesn’t have to be guesswork. Follow this guide step by step: prepare the machine, select the right tool, install the holder, set the height, calibrate, and test. Each step builds on the last. Skip one, and the whole setup suffers.
The biggest takeaway? Measure everything. Eye-balling tool height or skipping calibration is how shops burn through inserts and scrap parts. A $15 dial indicator saves you hundreds in wasted material.
Start with CNMG holders and carbide inserts. Master the basics. Then move to ISO holders and coated inserts as your volume grows. The process stays the same. The tools just get better.
FAQ
What is the most common mistake when setting up lathe tooling?
Setting tool height by eye instead of using a gauge or tailstock center. This causes consistent diameter errors.
How often should I replace lathe tooling inserts?
Carbide inserts last 15–45 minutes in production turning. HSS lasts 5–10 minutes. Replace when you see flank wear exceeding 0.015″ or edge chipping.
Can I use the same tool holder for roughing and finishing?
Yes, but change the insert. Use a 1.2mm nose radius for roughing and 0.4–0.8mm for finishing. Don’t swap inserts mid-operation.
What RPM should I run for aluminum turning?
Start at 2,000–3,000 RPM for a 2″ diameter. Use 600–800 SFM. Never let the tool dwell in one spot.
Do I need to calibrate my lathe every day?
No. Once a month is enough for most shops. Calibrate after any crash, maintenance, or if parts start drifting out of tolerance.
What’s the best tool holder for a small shop?
CNMG clamp-style holders. They’re cheap, versatile, and work for 90% of turning jobs. Keep 3–5 sizes on hand.
Get Projects Quote with Moshijia Technology
Need custom lathe tooling solutions or CNC machining quotes? Moshijia Technology delivers precision tooling and prototyping for shops of all sizes. Reach out for a fast, no-obligation quote.