Learning CNC turning feels overwhelming at first. Where do you start? What if you crash the machine? The truth is, mastery follows a clear path. You do not need years of trial and error. This step-by-step guide takes you from beginner to confident operator. Follow these steps in order. Each one builds on the last. Skip nothing. You will make better parts faster and avoid costly mistakes.
Step 1: Learn the Machine Basics
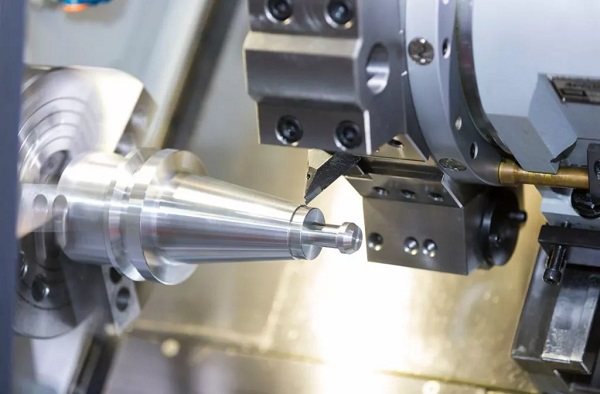
Before you cut any metal, understand what a CNC turning center actually does. The concept is simple. The workpiece spins. The cutting tool moves. The computer controls everything.
Know the main parts
| Component | What It Does |
|---|---|
| Spindle | Rotates the workpiece at programmed speeds |
| Chuck | Clamps the workpiece securely |
| Tool turret | Holds multiple cutting tools |
| Tailstock | Supports long parts (optional) |
| Coolant system | Cools the cut and removes chips |
| Controller | Reads G-code and directs movement |
Understand the axes
- X-axis — Controls diameter. Moves the tool toward or away from center.
- Z-axis — Controls length. Moves the tool along the workpiece.
- C-axis (advanced) — Rotates the part for live tooling operations.
Know the basic operations
Every CNC turning job uses these building blocks:
- Facing — Flattens the end of the part
- Straight turning — Reduces diameter along a length
- Taper turning — Creates angled surfaces
- Grooving — Cuts narrow slots
- Parting — Cuts off the finished part
- Boring — Enlarges internal holes
- Threading — Cuts screw threads
Goal of Step 1: Name every machine part and explain what each basic operation does.
Step 2: Understand Materials and Tooling
Most beginners fail here. They use the wrong tool for the material. Or they guess at speeds. You need a system.
Match tool to material
| Material | Tool Characteristics | Speed Range (SFM) |
|---|---|---|
| Aluminum | Sharp edge, polished surface, positive rake | 800–1600 |
| Carbon steel | Coated carbide, medium edge strength | 400–700 |
| Stainless steel | Tough coating (TiAlN), rigid setup | 250–450 |
| Plastics | Very sharp, high rake, no coolant | 600–1200 |
| Hardened steel (HRC 50+) | CBN or ceramic insert | 150–300 |
Nose radius matters
- Small nose radius (0.2–0.4 mm) — Fine details, lower cutting force, more chatter risk
- Large nose radius (0.8–1.2 mm) — Stronger edge, better finish, less chatter
Pro rule: Use the largest nose radius your part geometry allows. Switch to smaller only for shoulders or tight corners.
Tool types you need
- Turning tools (roughing and finishing)
- Grooving/parting tools
- Threading inserts
- Boring bars
- Drill bits (for center drilling)
Goal of Step 2: Select the right insert material and nose radius for any given job without looking it up.
Step 3: Master Speeds, Feeds, and Depth
Do not guess these numbers. Calculate them. The math is simple.
The three key numbers
Cutting speed (SFM or m/min) — How fast the material surface moves past the tool. Harder materials need lower SFM.
RPM calculation:
RPM = (SFM × 3.82) ÷ Diameter (inches)
Or: RPM = (m/min × 318) ÷ Diameter (mm)
Feed rate — How far the tool moves per spindle revolution. Measured in IPR or mm/rev.
Roughing vs. finishing guidelines
| Parameter | Roughing | Finishing |
|---|---|---|
| Depth of cut | 2–5 mm (0.080–0.200 in) | 0.2–0.5 mm (0.008–0.020 in) |
| Feed rate | 0.015–0.030 IPR | 0.004–0.010 IPR |
| Speed | Lower end of range | Higher end of range |
Real-world example: A beginner cutting 4140 steel used 600 SFM and 0.020 IPR feed. Inserts lasted 12 parts. An experienced machiner used 350 SFM with the same feed. Inserts lasted 85 parts. Speed alone made the difference.
Goal of Step 3: Calculate RPM from SFM and diameter. Know roughing vs. finishing parameters by heart.

Step 4: Learn Basic G-Code and M-Code
You do not need to write complex programs by hand. But you must read G-code. You need to know what the machine will do before it does it.
Essential G-codes
| Code | What It Does |
|---|---|
| G00 | Rapid move (fast positioning) |
| G01 | Linear feed (cutting move) |
| G02 | Clockwise arc |
| G03 | Counter-clockwise arc |
| G96 | Constant surface speed |
| G97 | Constant RPM |
| G99 | Feed per revolution |
| G71 | Rough turning cycle |
| G76 | Threading cycle |
Essential M-codes
| Code | What It Does |
|---|---|
| M03 | Spindle on (clockwise) |
| M04 | Spindle on (counter-clockwise) |
| M05 | Spindle stop |
| M08 | Coolant on |
| M09 | Coolant off |
| M30 | Program end and rewind |
Read this example
G96 S200 M03 — Constant surface speed at 200 SFM, spindle clockwiseG99 G01 X-1.0 F0.010 — Feed per revolution, linear move to X-1.0 at 0.010 IPR
Goal of Step 4: Read a short G-code program and describe exactly what each line does.
Step 5: Master Machine Setup and Workholding
Bad setup guarantees bad parts. Take your time here. Rushing causes crashes.
The setup checklist
- Load the workpiece into the chuck. Leave enough stick-out for all operations.
- Check runout with a dial test indicator. Keep it under 0.025 mm (0.001 in).
- Install tools in the turret. Keep overhang as short as possible.
- Set tool offsets — Touch off each tool and record X and Z geometry.
- Set work zero (program zero point) for the part.
- Check clearances — Rotate the turret manually. No tools should hit the chuck or tailstock.
Clamping force by material
| Material | Safe Chuck Pressure |
|---|---|
| Steel | 7.5–12.5 kN/cm² |
| Aluminum | 3.75–6.25 kN/cm² |
| Brass | 4–7 kN/cm² |
Pro tip: For thin-walled parts, machine soft jaws to match your part’s outer diameter. This distributes clamping force evenly.
Goal of Step 5: Complete a full machine setup without looking at notes. Then dry-run before cutting metal.
Step 6: Practice Basic Operations One by One
Do not jump to complex parts. Master each operation individually. Get consistent results before moving on.
The practice sequence
| Step | Operation | Success Criterion |
|---|---|---|
| 1 | Facing | Flat end, no center pip |
| 2 | Straight turning | Diameter holds ±0.025 mm over 50mm length |
| 3 | Taper turning | Angle matches print within 0.5 degrees |
| 4 | Grooving | Width and depth accurate, no burrs |
| 5 | Parting | Clean break, no insert chipping |
| 6 | Boring | Round hole, no chatter marks |
| 7 | Threading | Go/no-go gauge passes correctly |
Real-world example: A trainee spent two weeks practicing only facing and straight turning. After that, he learned grooving in one day. His coworker tried all operations at once. He crashed two tools and scrapped 15 parts. Master one skill at a time.
Goal of Step 6: Run each basic operation successfully on three different materials.
Step 7: Learn to Eliminate Chatter
Chatter ruins surface finish and accuracy. It is the number one enemy of CNC turning. Learn to stop it.
The five causes and fixes
| Cause | Fix |
|---|---|
| Tool overhang too long | Shorten to less than 4x tool height |
| Long thin part (L/D > 4:1) | Add tailstock or steady rest |
| Wrong spindle speed | Change RPM by 10–20% to avoid resonance |
| Weak clamping | Increase chuck pressure (check part distortion) |
| Dull insert | Index or replace |
The damping bar secret
For deep holes (depth over 4x diameter), standard boring bars chatter. Use an anti-vibration boring bar with a built-in damper. These allow bores up to 10x diameter without chatter.
Goal of Step 7: Diagnose the cause of any chatter in under 30 seconds. Apply the correct fix.
Step 8: Move to Advanced Techniques
Once basics are solid, expand your capabilities. These advanced CNC turning techniques separate pros from beginners.
Live tooling (turn-mill)
With a C-axis and driven tools, you can:
- Mill flats and hex shapes
- Drill cross holes at any angle
- Cut slots and keyways
- Tap threads without a second machine
Hard turning
Cut hardened steel (HRC 45–65) using CBN or ceramic inserts. Replaces grinding for many parts. Cycle times drop 5–10x.
Bar feeding automation
Add a bar feeder for lights-out production. The machine runs unattended overnight. One operator runs multiple machines.
Goal of Step 8: Identify which advanced technique solves your most common production bottleneck.
Step 9: Program with CAM Software
Manual G-code is slow and error-prone. CAM software changes that. It generates safe, optimized toolpaths from your 3D model.
Popular CAM options for turning
| Software | Best For |
|---|---|
| Fusion 360 | Beginners, low cost, integrated CAD/CAM |
| Mastercam | Industrial shops, complex parts |
| GibbsCAM | User-friendly, strong turning module |
| SolidCAM | Integrated with SolidWorks |
The CAM workflow
- Import or create 3D model
- Define stock material and size
- Select operations (face, turn, groove, etc.)
- Choose tools from library
- Set speeds and feeds
- Generate toolpath
- Simulate to check for crashes
- Post-process to G-code
Never skip simulation. It catches crashes before they happen.
Goal of Step 9: Take a simple CAD model and produce verified G-code using CAM software.
Step 10: Inspect, Document, and Improve
Mastery is not a destination. It is continuous improvement. Measure everything. Track what works. Refine constantly.
Inspection tools you need
- Micrometer — Outside diameters
- Bore gauge — Inside diameters
- Dial indicator — Runout and alignment
- Surface roughness tester — Finish quality
- Thread gauges — Go/no-go for threads
What to track
| Data Point | Why It Matters |
|---|---|
| Tool life (parts per edge) | Know when to change inserts |
| Speeds and feeds that work | Build your own database |
| Offset changes over time | Detect thermal growth patterns |
| Scrap rate by operation | Find weak spots |
The daily improvement habit
At the end of each shift, answer three questions:
- What went wrong today?
- What caused it?
- What one change prevents it tomorrow?
Goal of Step 10: Reduce your scrap rate by 50% within three months using data, not guesses.
Common Problem Troubleshooting
| Problem | Most Likely Cause | Fix |
|---|---|---|
| Oversized OD | Tool offset wrong | Reduce X offset |
| Undersized OD | Tool wear or thermal growth | Add wear offset |
| Poor surface finish | Wrong speed or feed | Increase speed, reduce feed |
| Taper on straight cut | Tailstock misaligned | Align tailstock to spindle |
| Broken insert | Too much depth or feed | Reduce DOC or feed by 50% |
| Birds nest chips | Wrong chip breaker | Change insert or increase feed |
Conclusion
Mastering CNC turning follows a clear path. Learn the machine basics. Understand materials and tooling. Calculate speeds and feeds. Read G-code. Set up the machine properly. Practice one operation at a time. Eliminate chatter. Add advanced techniques. Use CAM software. Inspect and improve daily. Follow these steps in order. Do not skip. Within six months, you will make parts that experienced machinists respect. Within a year, you will be the person others ask for help.
FAQ
How long does it take to master CNC turning?
Basic proficiency takes 3–6 months of regular practice. True mastery takes 2–3 years. But you can make good parts within weeks by following this step-by-step guide.
Do I need to learn G-code for CNC turning?
Yes, at least to read it. You do not need to write complex programs by hand. But you must understand what the code does to catch errors before they cause crashes.
What is the hardest part of CNC turning for beginners?
Setting correct speeds and feeds. Most beginners run too fast and burn up inserts. The second hardest is eliminating chatter.
Can I learn CNC turning without a machine?
Partially. Use CAM software with simulation to learn programming. Watch setup videos. But you need hands-on time to develop feel for feeds, speeds, and chatter control.
What is the most common crash in CNC turning?
Z-axis error. The tool feeds into the chuck instead of stopping at the part face. Always verify Z zero point and dry-run before cutting metal.
Get projects quote with Moshijia Technology
Ready to put your CNC turning skills to work? Moshijia Technology provides precision turning services for prototypes and production. Upload your CAD file for a free quote and engineering review.