Introduction
Choosing the wrong metal thickness can break a manufacturing project. In sheet metal fabrication, precision is everything. If you select a material that is slightly too thin, your product might buckle under stress. If you choose a material that is too thick, your production costs will soar, and your product will be too heavy.
At Moshijia Technology, we see product engineers, quality inspectors, procurement managers, and DIY enthusiasts grapple with this challenge daily. The biggest source of confusion? The sheet metal gauge system.
A sheet metal gauge chart is an essential tool that translates arbitrary gauge numbers into precise, measurable dimensions like inches and millimeters. However, a common misconception is that a specific gauge number represents the same thickness across all metals. It does not. 16-gauge steel is not the same thickness as 16-gauge aluminum.
This comprehensive guide will show you exactly how to use a sheet metal gauge chart effectively. You will learn how to read the charts, avoid costly material selection mistakes, and optimize your fabrication process for structural integrity and cost-efficiency.
Understanding Sheet Metal Gauge
To use a chart effectively, you must first understand what a gauge actually represents. It is not a random measurement system; it has deep historical roots in early industrial manufacturing.
Explanation of Gauge Numbers
The term gauge refers to a traditional unit of measurement for the thickness of sheet metal and the diameter of wire. The system originated in the early days of wire drawing. To make wire thinner, factories pulled a metal rod through a series of progressively smaller sizing dies.
Each time the metal passed through a die, it was “gauged” again. Therefore, the gauge number originally represented the number of times a wire had been drawn through a die.
Gauge Number and Thickness Relationship
Because the gauge number counts the sizing steps, the system has an inverse relationship:
- Higher gauge numbers mean the metal has been processed more times, making it thinner.
- Lower gauge numbers mean fewer processing steps, making the metal thicker.
For instance, a 10-gauge sheet of steel is significantly thicker than a 20-gauge sheet of steel. This inverse logic often trips up newcomers to the manufacturing industry. You must remember that as the gauge number goes up, the physical thickness goes down.
Common Materials and Standards
Different metals have different physical properties, such as density and malleability. Because of this, the industry developed distinct gauge standards for different material families. You cannot use a single standard for every metal sheet in your shop.
Here are the three primary standards used in modern fabrication:
- Standard Gauge for Sheet and Plate Iron and Steel: This is the universal standard for carbon steel and stainless steel.
- Brown & Sharpe Gauge (American Wire Gauge – AWG): This standard applies to non-ferrous metals, primarily aluminum, brass, and copper.
- Galvanized Sizing Standard: This system measures steel that has been coated with zinc. The zinc layer adds thickness, so galvanized steel has its own specific chart to ensure the base metal strength is accurate.
Overview of the Sheet Metal Gauge Chart
A sheet metal gauge chart is a matrix that organizes these different standards into a scannable tool. Without this chart, calculating material weight, bend allowances, and tooling setups becomes nearly impossible.
Chart Layout and Structure
A standard professional gauge chart is typically organized into a clean grid. The leftmost column lists the gauge numbers in numerical order, usually from 3-gauge down to 36-gauge.
The subsequent columns are divided by material type. Under each material type, the chart provides two critical values for every gauge number: the decimal equivalent in inches and the metric equivalent in millimeters.
Types of Gauges Included
When you look at a comprehensive master chart, you will see several systems side-by-side. Understanding these systems prevents catastrophic design errors.
- Manufacturer’s Standard Gauge: Used almost exclusively for standard steel sheet products.
- U.S. Standard Gauge: An older system based on weight per square foot rather than direct thickness, still referenced in some legacy military and aerospace designs.
- American Wire Gauge (AWG): The definitive standard for aluminum sheet metal and electrical wiring.
Importance of Using Standardization
Using a standardized master chart eliminates guesswork between the design phase and the factory floor. If a product engineer in the US writes “14 Gauge” on a blueprint without specifying the material standard, a factory worker in Asia or Europe might look at a different chart and fabricate the part with a completely different thickness.
Standard charts ensure that a 16-gauge aluminum bracket measures exactly 0.0508 inches ($1.290 \text{ mm}$) every single time, regardless of where it is manufactured.
How to Read a Sheet Metal Gauge Chart
Reading a chart looks simple, but a structured approach prevents errors. Follow this step-by-step method to ensure you extract the correct data every time.
Step-by-Step Interpretation Guide
To find the exact thickness of your material, follow these four basic steps:
- Identify the specific metal type you are using (e.g., carbon steel, stainless steel, or aluminum).
- Locate the gauge column on the chart that matches your chosen material standard.
- Scroll vertically down the leftmost column to find your target gauge number.
- Move horizontally across to the intersection of your material column to read the thickness in inches or millimeters.
Identifying Material Types Correctly
Never look at the generic “Steel” column if you are working with stainless steel or aluminum. Let us look at a real-world example to see how much these materials differ at the exact same gauge number.
If you look across a standard chart at 16-Gauge, you will find these distinct thicknesses:
- Standard Steel: 0.0598 inches ($1.519 \text{ mm}$)
- Stainless Steel: 0.0625 inches ($1.588 \text{ mm}$)
- Aluminum: 0.0508 inches ($1.290 \text{ mm}$)
- Galvanized Steel: 0.0635 inches ($1.613 \text{ mm}$)
As you can see, 16-gauge galvanized steel is nearly $25\%$ thicker than 16-gauge aluminum. Mixing these up in production can ruin your tooling or cause the assembly to fail.
Master Sheet Metal Gauge Chart
Below is a professional-grade reference chart detailing the precise conversions for the most common industrial gauges and materials.
| Gauge Number | Standard Steel (in) | Standard Steel (mm) | Galvanized Steel (in) | Galvanized Steel (mm) | Stainless Steel (in) | Stainless Steel (mm) | Aluminum (in) | Aluminum (mm) |
|---|---|---|---|---|---|---|---|---|
| 10 | 0.1345 | 3.416 | 0.1382 | 3.510 | 0.1406 | 3.571 | 0.1019 | 2.588 |
| 11 | 0.1196 | 3.038 | 0.1233 | 3.132 | 0.1250 | 3.175 | 0.0907 | 2.304 |
| 12 | 0.1046 | 2.657 | 0.1084 | 2.753 | 0.1094 | 2.779 | 0.0808 | 2.052 |
| 13 | 0.0897 | 2.278 | 0.0934 | 2.372 | 0.0937 | 2.380 | 0.0720 | 1.829 |
| 14 | 0.0747 | 1.897 | 0.0785 | 1.994 | 0.0781 | 1.984 | 0.0641 | 1.628 |
| 15 | 0.0673 | 1.709 | 0.0710 | 1.803 | 0.0703 | 1.786 | 0.0571 | 1.450 |
| 16 | 0.0598 | 1.519 | 0.0635 | 1.613 | 0.0625 | 1.588 | 0.0508 | 1.290 |
| 17 | 0.0538 | 1.367 | 0.0575 | 1.461 | 0.0563 | 1.430 | 0.0453 | 1.151 |
| 18 | 0.0478 | 1.214 | 0.0516 | 1.311 | 0.0500 | 1.270 | 0.0403 | 1.024 |
| 19 | 0.0418 | 1.062 | 0.0456 | 1.158 | 0.0438 | 1.113 | 0.0359 | 0.912 |
| 20 | 0.0359 | 0.912 | 0.0396 | 1.006 | 0.0375 | 0.953 | 0.0320 | 0.813 |
| 21 | 0.0329 | 0.836 | 0.0366 | 0.930 | 0.0344 | 0.874 | 0.0285 | 0.724 |
| 22 | 0.0299 | 0.759 | 0.0336 | 0.853 | 0.0313 | 0.795 | 0.0253 | 0.643 |
| 24 | 0.0239 | 0.607 | 0.0276 | 0.701 | 0.0250 | 0.635 | 0.0201 | 0.511 |
| 26 | 0.0179 | 0.455 | 0.0217 | 0.551 | 0.0188 | 0.478 | 0.0159 | 0.404 |
Applications of Sheet Metal Gauge Charts
Every major industrial sector relies on gauge charts to guarantee the safety, functionality, and cost-effectiveness of their products. Let us look at where these numbers map to real-world applications.
Industries Utilizing Gauge Charts
In automotive manufacturing, engineers use highly specific gauges to optimize the balance between vehicle safety and weight reduction. Car body panels are typically made from thin 18-gauge to 20-gauge steel to keep the vehicle aerodynamic and fuel-efficient, while structural chassis components utilize thick 8-gauge to 12-gauge steel frames to absorb impact energy.
In the HVAC and ductwork industry, galvanization is critical to prevent rust from condensation. Technicians reference galvanized gauge charts to build large commercial duct systems. They typically use 22-gauge to 24-gauge sheets to ensure the ducts are rigid enough to handle high-velocity airflow without popping or vibrating loudly.
In the aerospace and electronics sectors, weight is the most critical constraint. Designers rely on aluminum wire and sheet gauge charts to build lightweight enclosures, heat sinks, and drone frames. These parts usually require thin, highly malleable 20-gauge to 26-gauge aluminum sheets.
Material Thickness Application Guide
To help you choose the right material for your project, here is a quick breakdown of common gauge ranges and their typical industrial uses:
- Heavy Duty (7 to 10 Gauge): Structural frames, heavy machinery components, industrial trailers, security safes, and structural brackets.
- Medium Duty (11 to 16 Gauge): Automotive body parts, large appliance chassis, industrial electrical enclosures, HVAC equipment, and metal furniture.
- Light Duty (17 to 22 Gauge): Computer cases, architectural paneling, electronic enclosures, ductwork, and office storage cabinets.
- Ultra-Light Duty (23 to 30 Gauge): Metal cans, foil wraps, precision shims, decorative trim, and intricate gaskets.
[Heavy Duty: 7-10 GA] ----> Structural Frames & Machinery
[Medium Duty: 11-16 GA] ----> Automotive Panels & Enclosures
[Light Duty: 17-22 GA] ----> Electronics Boxes & Ductwork
[Ultra-Light: 23-30 GA] ----> Shims, Gaskets, & Decorative Trim
Importance in Design and Fabrication
When designing a sheet metal part in CAD software, you must input the exact decimal thickness, not just the gauge number. Laser cutters, CNC press brakes, and punching machines operate on strict physical dimensions.
If you design a part using a generic thickness that does not align with a standard commercial gauge chart, the fabrication shop will have to manually redesign your files. This delays production and increases your engineering lead times.
Common Mistakes When Using a Gauge Chart
Even experienced machinists and engineers occasionally make mistakes when reading gauge values. Identifying these common errors can save your business thousands of dollars in scrapped inventory.
Misinterpretation of Gauge Numbers
The single most common mistake is assuming that a larger gauge number means a thicker sheet of metal. As discussed earlier, a 24-gauge sheet is thin and flexible, while a 10-gauge sheet is thick and rigid.
If a procurement manager accidentally orders 22-gauge steel instead of 12-gauge steel for an industrial workbench frame, the final product will buckle under the weight of heavy equipment. Always double-check the decimal equivalent on the chart before placing a raw material order.
Confusion Between Different Materials
Another frequent pitfall is using a steel gauge chart to inspect an aluminum shipment. If a quality control inspector checks a batch of incoming 14-gauge aluminum sheets using a standard steel gauge chart, they will expect a thickness of 0.0747 inches ($1.897 \text{ mm}$).
However, the actual thickness of 14-gauge aluminum is 0.0641 inches ($1.628 \text{ mm}$). The inspector might erroneously reject a perfectly manufactured batch of aluminum parts simply because they referenced the wrong material column on their chart.
Ignoring Manufacturing Tolerance Ranges
No sheet metal mill can produce an absolutely perfect thickness across miles of rolled metal coils. Every gauge number has an allowable manufacturing tolerance window.
For example, standard 16-gauge hot-rolled steel has a nominal thickness of 0.0598 inches, but the acceptable commercial tolerance range can span from 0.0538 inches to 0.0658 inches.
16-Gauge Hot-Rolled Steel Thickness Range:
[0.0538 in] <----------- [0.0598 in Nominal] -----------> [0.0658 in]
If your product relies on a hyper-precise slip-fit connection, you must design your mating parts around these maximum and minimum tolerance boundaries, rather than relying solely on the nominal chart value.
Tips for Effective Use of a Gauge Chart
To make the gauge chart an seamless part of your daily workflow, implement these practical, shop-tested habits.
Cross-Referencing with Other Resources
Never rely on a single unverified digital gauge chart found on a random website. Always cross-reference your internal shop charts with established international standards organizations, such as the ASTM International (American Society for Testing and Materials) or the ANSI (American National Standards Institute).
Most metal service centers provide their own certified gauge charts that match the exact stock they purchase from the steel mills. Use their specific charts during the final drafting phase.
Keeping Physical and Digital Copies Available
In a busy production facility, efficiency drops when workers have to walk back to an office computer to check a material dimension. Hang large, laminated, high-contrast physical gauge charts directly next to your sheet metal shear, laser cutter, and press brake.
Additionally, provide your design engineers with digital PDF copies that they can pin to their second monitors while modeling parts in SolidWorks or AutoCAD.
Regular Verification of Inspection Tools
If your quality control team uses physical wheel-type wire and sheet gauge pockets tools, inspect them regularly for physical wear. Over time, sliding metal sheets in and out of the measuring slots can wear down the edges of the tool, causing it to display inaccurate readings.
Calibrate your shop measuring tools monthly using high-precision hardened steel micrometer check blocks.
Practical Steps: How to Verify Sheet Metal Thickness on the Shop Floor
Reading the chart is only half the battle. You must also know how to measure the physical material accurately on the shop floor to verify that it matches your chart. Follow this operational checklist to ensure precise verification:
- Clean the Material Surface: 1 Minute.
Locate an unbent edge of the sheet metal. Use a clean microfiber cloth and a mild solvent to completely remove any industrial rust-preventative oils, dirt, or metal burrs from the measurement zone. Even a thin layer of oil can add 0.002 inches to your measurement, throwing off your gauge identification. - Calibrate Your Measuring Instrument: 2 Minutes.
Take a high-quality digital micrometer or vernier caliper. Close the measuring jaws completely and ensure the digital screen reads exactly zero. If using a dial caliper, make sure the needle rests perfectly on the zero mark. Hardened micrometers are preferred over calipers because they apply consistent, ratcheted pressure to the metal sheet. - Measure Away From the Sheared Edge: 1 Minute.
Slide the micrometer anvil over the edge of the sheet metal. Position the measuring faces at least 0.5 inches inward from the raw cut edge. Avoid measuring directly on a sheared or laser-cut edge, as the cutting process often creates small metal burrs or localized heat deformation that artificially inflates the thickness reading. - Lock and Read the Measurement: 1 Minute.
Gently tighten the micrometer friction thimble until it clicks three times. Lock the spindle in place and read the decimal value on the digital screen. Take three separate measurements along the sheet edge and calculate the mathematical average to eliminate local variations. - Cross-Reference the Master Chart: 2 Minutes.
Take your final average decimal measurement and locate your specific material column on your master gauge chart. Find the gauge row where your measured value falls within the acceptable manufacturing tolerance window. Record the verified gauge number on your material tracking tag.
Tools and Resources for Working with Sheet Metal
To achieve high-quality results in sheet metal fabrication, you must pair your gauge chart with the proper measuring and cutting equipment.
Recommended Measuring and Cutting Tools
For manual inspection, standard digital micrometers are the gold standard for accuracy. They provide direct readouts down to 0.0001 inches ($0.0025 \text{ mm}$).
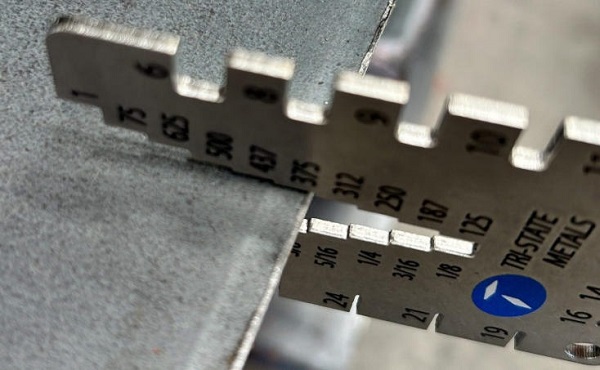
A round sheet metal gauge wheel tool is also convenient for quick sorting on the shop floor. It features a series of peripheral slots that allow you to quickly slide the tool over a sheet edge to identify its gauge without reading small digital screens.
       Quick Sorting Wheel Tool
             ___________
          /  10  11  12  \
         | 9           13 |
         | 8    (O)    14 |  <--- Slide slot over metal edge
         | 7           15 |
          \__6___5___4___/
When it comes to cutting, matching your cutting method to the material gauge is critical:
- 22 to 30 Gauge (Ultra-Thin): Can be cut cleanly using manual hand snips or aviation shears without warping the material profile.
- 14 to 20 Gauge (Light to Medium): Requires a pneumatic air shear, a motorized nibbler, or a mechanical foot-powered stomp shear.
- 12 Gauge and Thicker (Heavy Duty): Requires industrial manufacturing machinery, such as a high-definition CNC plasma cutter, an industrial fiber laser cutter, or a hydraulic plate shear.
Online Resources and Conversion Apps
If you are working remotely or traveling to a client’s facility without a physical chart, you can utilize digital web tools. Websites like MatWeb offer comprehensive material property databases that provide exact material densities and thickness profiles.
Additionally, there are numerous free mobile applications available for iOS and Android, such as the Metal Weight Calculator, which allows you to input a material type, shape, and gauge number to immediately calculate both its physical thickness and total shipment weight.
Case Studies: Real-World Applications
To better appreciate the practical value of master gauge charts, let us analyze two real-world scenarios from our engineering logs at Moshijia Technology.
Case Study 1: The Vibrating HVAC Enclosure Error
A commercial HVAC equipment manufacturer designed a large, rooftop ventilation housing unit. The engineering team specified 16-gauge aluminum on their CAD blueprints to keep the roof load light.
However, the purchasing department sourced raw sheet materials from an unverified vendor using a general steel gauge chart. The vendor delivered sheets that measured 0.0508 inches thick—which is correct for 16-gauge aluminum, but the procurement team checked it against a steel chart and thought they were receiving a product that matched a steel thickness profile ($0.0598 \text{ inches}$).
When the units were assembled and the high-power fans spun up to full operational speed, the thin aluminum panels lacked the structural rigidity required for that large surface area. The panels began to oil-can and vibrate loudly, generating excessive acoustic noise that exceeded municipal building codes.
- The Costly Outcome: The manufacturer had to recall 45 completed rooftop units, strip off the vibrating panels, and re-fabricate the housings using thicker 12-gauge aluminum ($0.0808 \text{ inches}$). This mistake resulted over $\$32,000$ in wasted materials and express shipping fees.
- The Lesson Learned: Always verify that your material suppliers and internal procurement teams are referencing the exact same material-specific gauge standard before signing off on material receipt inspections.
Case Study 2: Weight Optimization in Medical Enclosures
A medical device startup partnered with Moshijia Technology to develop a mobile diagnostic workstation cart. The initial prototype designed by the client used heavy 12-gauge stainless steel for the outer cosmetic panels to give the device a premium, durable feel.
Our product engineering team reviewed the design files and realized the fully assembled medical cart would weigh over 180 pounds, making it incredibly difficult for hospital nurses to push across carpeted rooms.
We sat down with the client and reviewed our master sheet metal gauge chart to perform a structural optimization analysis. We demonstrated that by switching the cosmetic outer panels from 12-gauge stainless steel ($0.1094 \text{ inches}$) down to 18-gauge stainless steel ($0.0500 \text{ inches}$), we could reduce the total panel weight by over $54\%$ while still maintaining excellent impact resistance.
To compensate for the thinner material, we designed small, strategically placed 14-gauge internal reinforcing ribs at critical stress centers.
Material Optimization Breakdown:
[12 GA Stainless Panel: 0.1094 in]  ===>  Heavy & Expensive Prototype
                    |
                    v (Engineered Optimization)
[18 GA Stainless Panel: 0.0500 in]  ===>  54% Weight Reduction + High Strength
+ [14 GA Internal Reinforcing Ribs]- The Successful Outcome: The redesigned cart dropped to a highly maneuverable 95 pounds. Furthermore, reducing the material thickness cut raw material purchasing costs by $\$42$ per unit.
- The Lesson Learned: Clever engineering paired with an accurate understanding of gauge charts allows you to down-gauge sheet products safely, saving money and improving product ergonomics without sacrificing durability.
Conclusion
Mastering the sheet metal gauge chart is a fundamental requirement for anyone involved in design, manufacturing, or quality assurance. By understanding that gauge numbers share an inverse relationship with thickness, and recognizing that steel, stainless steel, and aluminum all operate under completely independent sizing standards, you can eliminate the primary causes of fabrication errors.
Always use calibrated measuring tools, account for standard mill thickness tolerances, and ensure your entire supply chain references identical standardized charts. This attention to detail guarantees that your parts fit perfectly on the first assembly run, minimizing scrap material and accelerating your time-to-market.
FAQ
- Is a higher gauge thicker or thinner?
A higher gauge number is always thinner. For example, 24-gauge sheet metal is thin like cardstock, while 10-gauge sheet metal is thick like a heavy structural plate. - Why does 16-gauge steel measure differently than 16-gauge aluminum?
They measure differently because they follow completely distinct industrial standards. Steel thickness is determined by the Manufacturer’s Standard Gauge system, which is based on weight-to-thickness ratios for ferrous metals. Aluminum thickness is determined by the Brown & Sharpe (AWG) system, which regulates non-ferrous materials. - Can I use a standard wire gauge chart to measure sheet metal?
No. While the American Wire Gauge (AWG) system matches the aluminum sheet chart, it does not match standard steel or stainless steel charts. Using a wire chart for steel sheet products will result in massive measurement errors. - How does galvanization affect the gauge thickness of steel?
Galvanization adds a protective layer of zinc to both sides of a raw steel sheet. This zinc coating adds roughly 0.003 to 0.004 inches to the total thickness of the sheet. Therefore, a galvanized gauge chart accounts for this coating thickness so that the underlying structural steel remains accurate to strength specifications. - What is the most common gauge used for general metal fabrication?
For everyday enclosures, brackets, and brackets, 14-gauge and 16-gauge metals are the most popular choices across the industry. They offer an ideal balance between high structural rigidity, reasonable raw material cost, and ease of bending on standard press brakes.
Get Projects Quote with Moshijia Technology
Need high-precision sheet metal parts fabricated without the headache of gauge confusion? Moshijia Technology is your trusted B2B manufacturing partner. Our team of expert product engineers reviews every blueprint to ensure your specified material gauges perfectly match your structural requirements.
We offer precision fiber laser cutting, CNC press brake bending, custom welding, and full-service assembly with certified ISO 9001:2015 quality standards.
Whether you need rapid prototypes or high-volume production runs in aluminum, stainless steel, or galvanized steel, we deliver flawless parts with industry-leading turnarounds.