Introduction
If you want to protect aluminum parts from wear and corrosion while adding a professional, decorative finish, you need to learn the anodizing process. Simply put, anodizing is an electrochemical method that transforms the metal’s surface into a tough, porous oxide layer. It’s not paint or plating; it grows directly from the aluminum itself. This guide breaks down the process into clear, manageable phases. Whether you are a weekend DIY enthusiast working in a garage or an engineer refining a production line, you will learn the precise steps, the critical parameters like temperature and current density, and the safety rules that prevent common failures like burning or color mismatch.
Why Anodize?
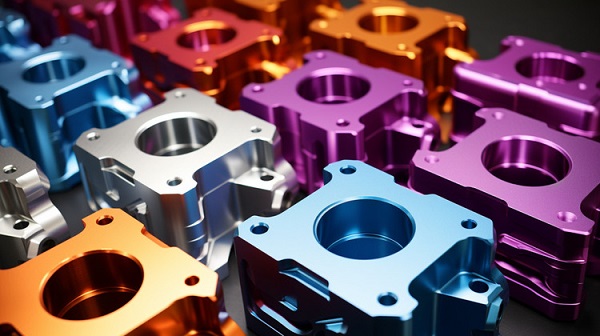
Anodizing solves two major material weaknesses. First, raw aluminum is relatively soft and scratches easily. The anodic layer we create is essentially sapphire—a crystalline form of aluminum oxide—which dramatically boosts surface hardness. Second, aluminum naturally oxidizes in air, forming a dull, messy white rust. Controlled anodizing replaces this destructive corrosion with a stable, protective barrier. From an aesthetic and functional perspective, the layer is also highly porous before sealing. We exploit these tiny pores to absorb dyes, giving you the option of architectural gold, deep black, or bright red finishes that bond at a molecular level and cannot peel.
What Type of Anodizing Is Best?
You cannot start mixing chemicals until you identify the right coating type for your end-use. Choosing wrong here leads to premature cracking or peeling.
Type II vs. Type III
Most general fabrication and consumer products use Type II (Sulfuric Acid Anodizing). It produces a clear, dyeable layer typically ranging from 5 to 25 microns thick. If you need extreme wear resistance—think firearm components, gears, or hydraulic valves—you need Type III (Hardcoat). This operates at near-freezing temperatures and slower current rates to produce a dense, dark gray layer often exceeding 50 microns. However, hardcoat surfaces carry higher internal stress; applying it over sharp internal corners without a radius often causes micro-cracking.
The Chromic Acid Exception
In aerospace bonding and high-fatigue structures, we often specify Type I (Chromic Acid). The layer is thinner and less abrasion-resistant, but it traps almost no corrosive acid, making it the safest choice for riveted fuselage skins where rinsing is difficult. However, due to hexavalent chromium environmental regulations, many shops have moved to thin-film sulfuric alternatives.
What Safety Gear Do You Need?
Before we discuss electricity and parts, let’s discuss protection. Anodizing involves sulfuric acid, caustic soda, and potentially hot dye baths. Minimum equipment includes indirect-vent chemical goggles, not just safety glasses. A full-face shield is better when mixing acid. Wear elbow-length rubber gloves and a PVC apron. The fumes, especially from the electrolyte tank during high-current runs, generate a fine sulfuric mist you should not breathe. A simple fume hood or local exhaust ventilation is mandatory, not optional. Keep a spill kit ready with baking soda. Never pour water into concentrated acid; always stir acid slowly into water to control the violent exothermic reaction.
How Do You Prep the Surface?
The final anodized look directly mirrors your mechanical prep work. The anodic layer is transparent; it magnifies defects rather than hiding them.
Cleaning and Degreasing
Any oil from machining or fingerprints blocks the current. Immerse the part in a heated, mildly alkaline detergent at 60°C (140°F) for 5 to 10 minutes. If the metal surface still holds water in a continuous sheet after rinsing (a water-break-free surface), it’s chemically clean.
Etching or Bright Dipping
A matte finish comes from a hot caustic soda etch. Dipping in a 50 g/L sodium hydroxide solution at 50°C for 2 to 3 minutes softens the aluminum grain, leaving a satin texture while effectively erasing fine die lines. If you want a mirror-like reflective finish, you need a chemical brightening bath—usually phosphoric and nitric acid at high temperature. Note: skip the etch entirely if you have a textured bead-blasted surface; over-etching smooths away that prized texture.
Desmutting
Aluminum alloys contain alloying elements like copper and silicon that do not dissolve in the caustic bath. Etching leaves a gray-black smudge on the surface. A room-temperature dip in 20-30% nitric acid (or an iron-based de-smutter for 6000-series castings) removes these residues, restoring a clean white metal ready for current flow. Rinse thoroughly; dragging nitric acid into your sulfuric tank weakens the bath.
How Does the Anodizing Tank Work?
This is where we grow the oxide. Understanding the electrical flow here separates a durable architectural finish from a soft coating you can wipe off.
Racking and Fixturing
Electrical contact dictates success. Use titanium racks for aluminum parts, or aluminum welding wire for small DIY batches (replace it often). The connection must be mechanically tight, not just resting. A wobbly grip causes arcing, overheating, and burn marks at the contact point. Calculate your total surface area—every square inch demands its proportionate share of current. We typically run Type II at a current density of 12 amps per square foot (approx. 1.3 A/dm²). If you eyeball the current setting, you will either starve the part or dissolve it.
Tank Parameters and Agitation
A standard electrolyte for clear and dyed work is 15-20% by weight sulfuric acid, held at 20-22°C (68-72°F). This is narrow. At 26°C (79°F), the acid starts attacking the pore walls, creating a powdery, non-sealed coating. You must agitate the tank with filtered, oil-free air. Without moving the solution away from the part surface, localized super-heating occurs, causing localized burning and a rough coating called “soft coat.”
The Ramp-Up Period
Do not slam the rectifier to full voltage. Use a ramp feature if available; if not, manually dial it up over 3-5 minutes. For standard Type II, you target a constant voltage of 15-18 volts. The anodizing time for a 10 to 15-micron layer is usually 45 to 60 minutes. For hardcoat, the cycle may run 90 minutes or more, starting at a higher voltage and often climbing to 60-75V to punch through the thicker layer’s resistance.
How Do You Add Color?
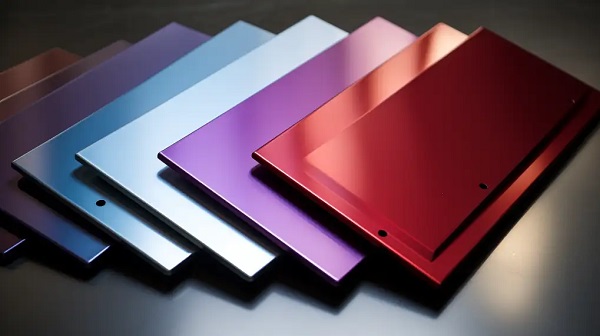
The color isn’t surface paint; it sits inside the oxide pores. This traps light but is physically impossible to rub off.
Electrolytic vs. Organic Dye
For a massive project, or when I must guarantee UV stability (outdoor architectural panels), I use electrolytic coloring, typically a tin bath with an AC current. For vibrant reds, blues, and blacks in indoor or hobby projects, organic anodizing dyes work beautifully. Dissolve the dye in distilled water, heat it to 55°C (130°F), and submerge the part for 10-15 minutes. The pores are actively absorbing; the longer the soak, the deeper the shade. Parts identical in exposure time give consistent batch colors.
Masking Sequence
If you want gold logos on a black background, you dye yellow first, then mask the logo, then dye black second. Because sealing closes the pores, you cannot dye over a sealed surface; it will just wipe off.
Why Does Sealing Matter?
An unsealed anodized surface is an empty honeycomb that picks up dirt, grease, and fingerprints instantly. Sealing hydrates the aluminum oxide crystals, swelling them to plug the top of the pores.
Mid-Temperature Sealing
Traditional boiling deionized water (98-100°C) for 30 minutes works, but it consumes massive energy. A modern mid-temp seal at 80°C (175°F), using a nickel acetate additive, gives a chemically complete seal in 15 minutes. I’ve unsealed dyed parts by accident; they fade within months under fluorescent UV light. A high-quality seal traps the dye molecules permanently, passing a 50-hour acetic acid salt spray test without white bloom corrosion.
The Cold Seal Option
Room-temperature nickel fluoride sealers are available. They work in 5 minutes, but they turn light colors slightly greenish. I avoid cold seal for clear-silver parts. Match your seal to your color.
Common Failures Table
| Problem | Likely Cause | Quick Fix |
|---|---|---|
| Burnt Parts | Poor electrical contact or current density too high. | Remove racking hotspots; recalculate surface area. |
| Rainbow/Color Mismatch | Inconsistent dye bath temperature or time. | Agitate dye; standardize soak to exact 12 min. |
| Soft Powdery Coating | Electrolyte temperature too high (>25°C). | Install a chiller unit; hold 20°C consistently. |
| No Coating Growth | Bad wire connection or wrong alloy (e.g., pure zinc cast). | Check titanium contact point; verify 6061 or 6063 alloy. |
| Dye Light Spots | Acid carryover into dye bath. | Add a neutralizing rinse of sodium bicarb between steps. |
Post-Treatment Quality Check
Before packing, test a sample from your batch. Rub the anodized surface hard with a white cloth soaked in acetone. No dye transfer should occur. For an adhesion check, scrape a cross-hatch with a sharp utility knife; the edges should remain clean with no flaking. I record the voltage graph from my rectifier for high-spec parts. A curve showing a steady rise then a gentle decline indicates a normal pore-building cycle; a sharp spike signals a short and a black burn spot you might miss visually.
Conclusion
Mastering anodizing means controlling four pillars: surface spotlessness, stable low temperature, precise current area ratios, and pore closure. From garage setups processing small brackets to automated lines running thousands of profiles, the chemistry is identical. Start with the 12 ASF rule, hold your tank at 20°C, verify your cleaning with a water-break test, and seal completely. With this sequence, you lift aluminum from a structural metal to an engineering material with the durability of ceramic.
FAQ
Can stainless steel racks be used for anodizing aluminum?
No. Stainless steel dissolves slowly in sulfuric acid when acting as an anode, contaminating the bath with iron. Use titanium or aluminum alloy racks. If you use aluminum wire for a DIY setup, strip and replace it when it thins out. A thin wire creates high resistance and hot spots.
Why does my black dye look blotchy under fluorescent light?
A common issue is dye absorption depth. If the anodic pores are too thin (under-ramping voltage), or the seal is initiated before the dye fully saturates, the dye rests only at shallow tips and wipes off easily. Always run the dye for at least 15 minutes at 55°C before opening the seal bath.
Is the voltage the same for cast aluminum and extruded aluminum?
No. High-silicon cast alloys (like A356) are much more resistive. You often need a higher initial voltage and a specialized desmutting step. However, the resulting coating on castings usually turns dark gray in dye because of trapped silicon particles; bright colors are hard to achieve.
How do I dispose of spent anodizing solution?
Never pour it down the drain. Spent sulfuric acid with dissolved aluminum salts is hazardous. Neutralize it slowly with hydrated lime or caustic soda in a controlled tank until a pH around 7 is reached. The precipitated aluminum hydroxide sludge may require disposal as industrial hazardous waste according to your local regulations.
Get projects quote with Moshijia Technology
Navigating the precise parameters of temperature, rectifier voltage, and chemical ratios can feel overwhelming when shifting from a rough prototype to a commercial batch with exact color tolerances. At Moshijia Technology, we provide surface treatment engineering support beyond just fabrication. If you have a complex part or a specific architectural finish requirement, share project details with our team for processing recommendations and a tailored manufacturing proposal.